Mettax
Video telematics is a vital functionality for many businesses. There are proprietary solutions that handle video feed from dashcams but offer limited possibilities for telematic readings of such devices. For this reason, we broadened our approach to integrations so our clients can make use of existing 3rd-party applications for video and benefit from Navixy’s extended telematics features at the same time.
Mettax is a great example of this scenario. Let’s see how easy it is to integrate with its capabilities right inside Navixy UI.
1. Establishing integration
First, you need to make the necessary preparations on the Mettax side.
In Mettax, device data is stored under individual user accounts. If your organization uses a parent account structure, you will need to perform the following steps for each user account that has devices. While this may require logging in and out of different accounts, it guarantees comprehensive and targeted coverage across your device fleet.
Log in to a user account that contains actual devices.
Turn on Developer mode to enable the necessary settings for our integration:
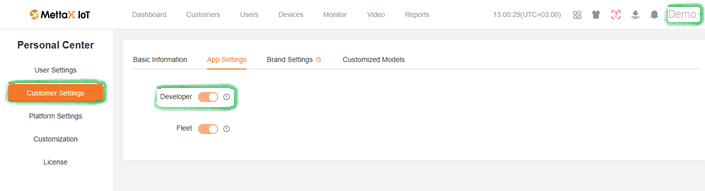
Click your account name in the upper-right corner of the window.
Go to Customer Settings.
Open the App Settings tab.
Enable the Developer option.
Install Webhooks to establish a connection between the two solutions:
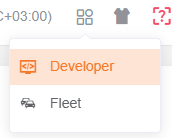
Click the apps icon and select Developer.
Go to Details.
Open the WEBHOOK tab.
Find these three webhooks, you will need to edit them:
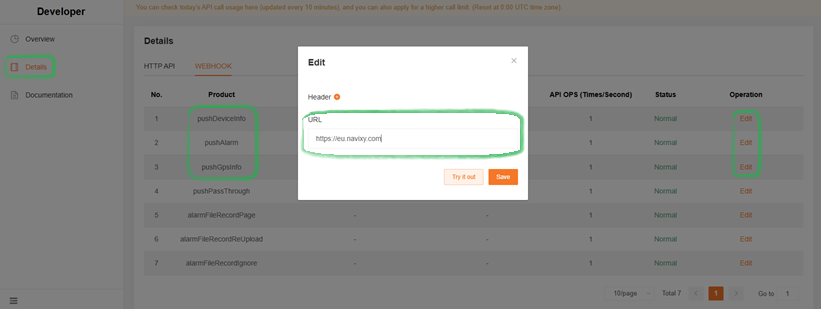
pushDeviceInfo
pushAlarm
pushGpsInfo
Click Edit in the needed webhook’s row to open its parameters.
Fill in the URL field with your Navixy instance address, depending on the region:
EU - https://mettax-tracker.navixy.com
US - https://mettax-tracker.us.navixy.com
Repeat the URL step for all 3 webhooks.
(optional) Repeat the steps above for all required user accounts.
Your Mettax account is ready for the integration!
2. Adding a Mettax device to Navixy
Navixy platform handles the GPS functionality of video devices and their telematic abilities. To make the most of the integration, you need to add your Mettax device to the platform, following the usual procedure:
Go to Device activation.
Select your Mettax device from the list.
Select SIM card purchased separately option and go to the next step.
Enter a correct Device ID
Complete the device configuration
For detailed instructions on how to activate a device in Navixy, see Activate GPS device.
Your device and Navixy account are ready for the integration!
3. Embedding Mettax in Navixy UI
At this step, we perform the actual integration.
Navixy offers User applications functionality that allows embedding 3rd-party apps directly in the platform’s interface. We will use it to embed Mettax.
Navigation
User applications section is accessible to account Owners in the Account Settings section. To find it:
Click the profile icon in the top-left corner of the screen to open your account settings
In the settings sidebar, select User applications
Create new application
Start by clicking thebutton in the User applications list.
Configure the new application
Put https://www.mettaxiot.com/#/dashboard in the App URL field.
Enter a Label for the application (e.g., Mettax dashboard).
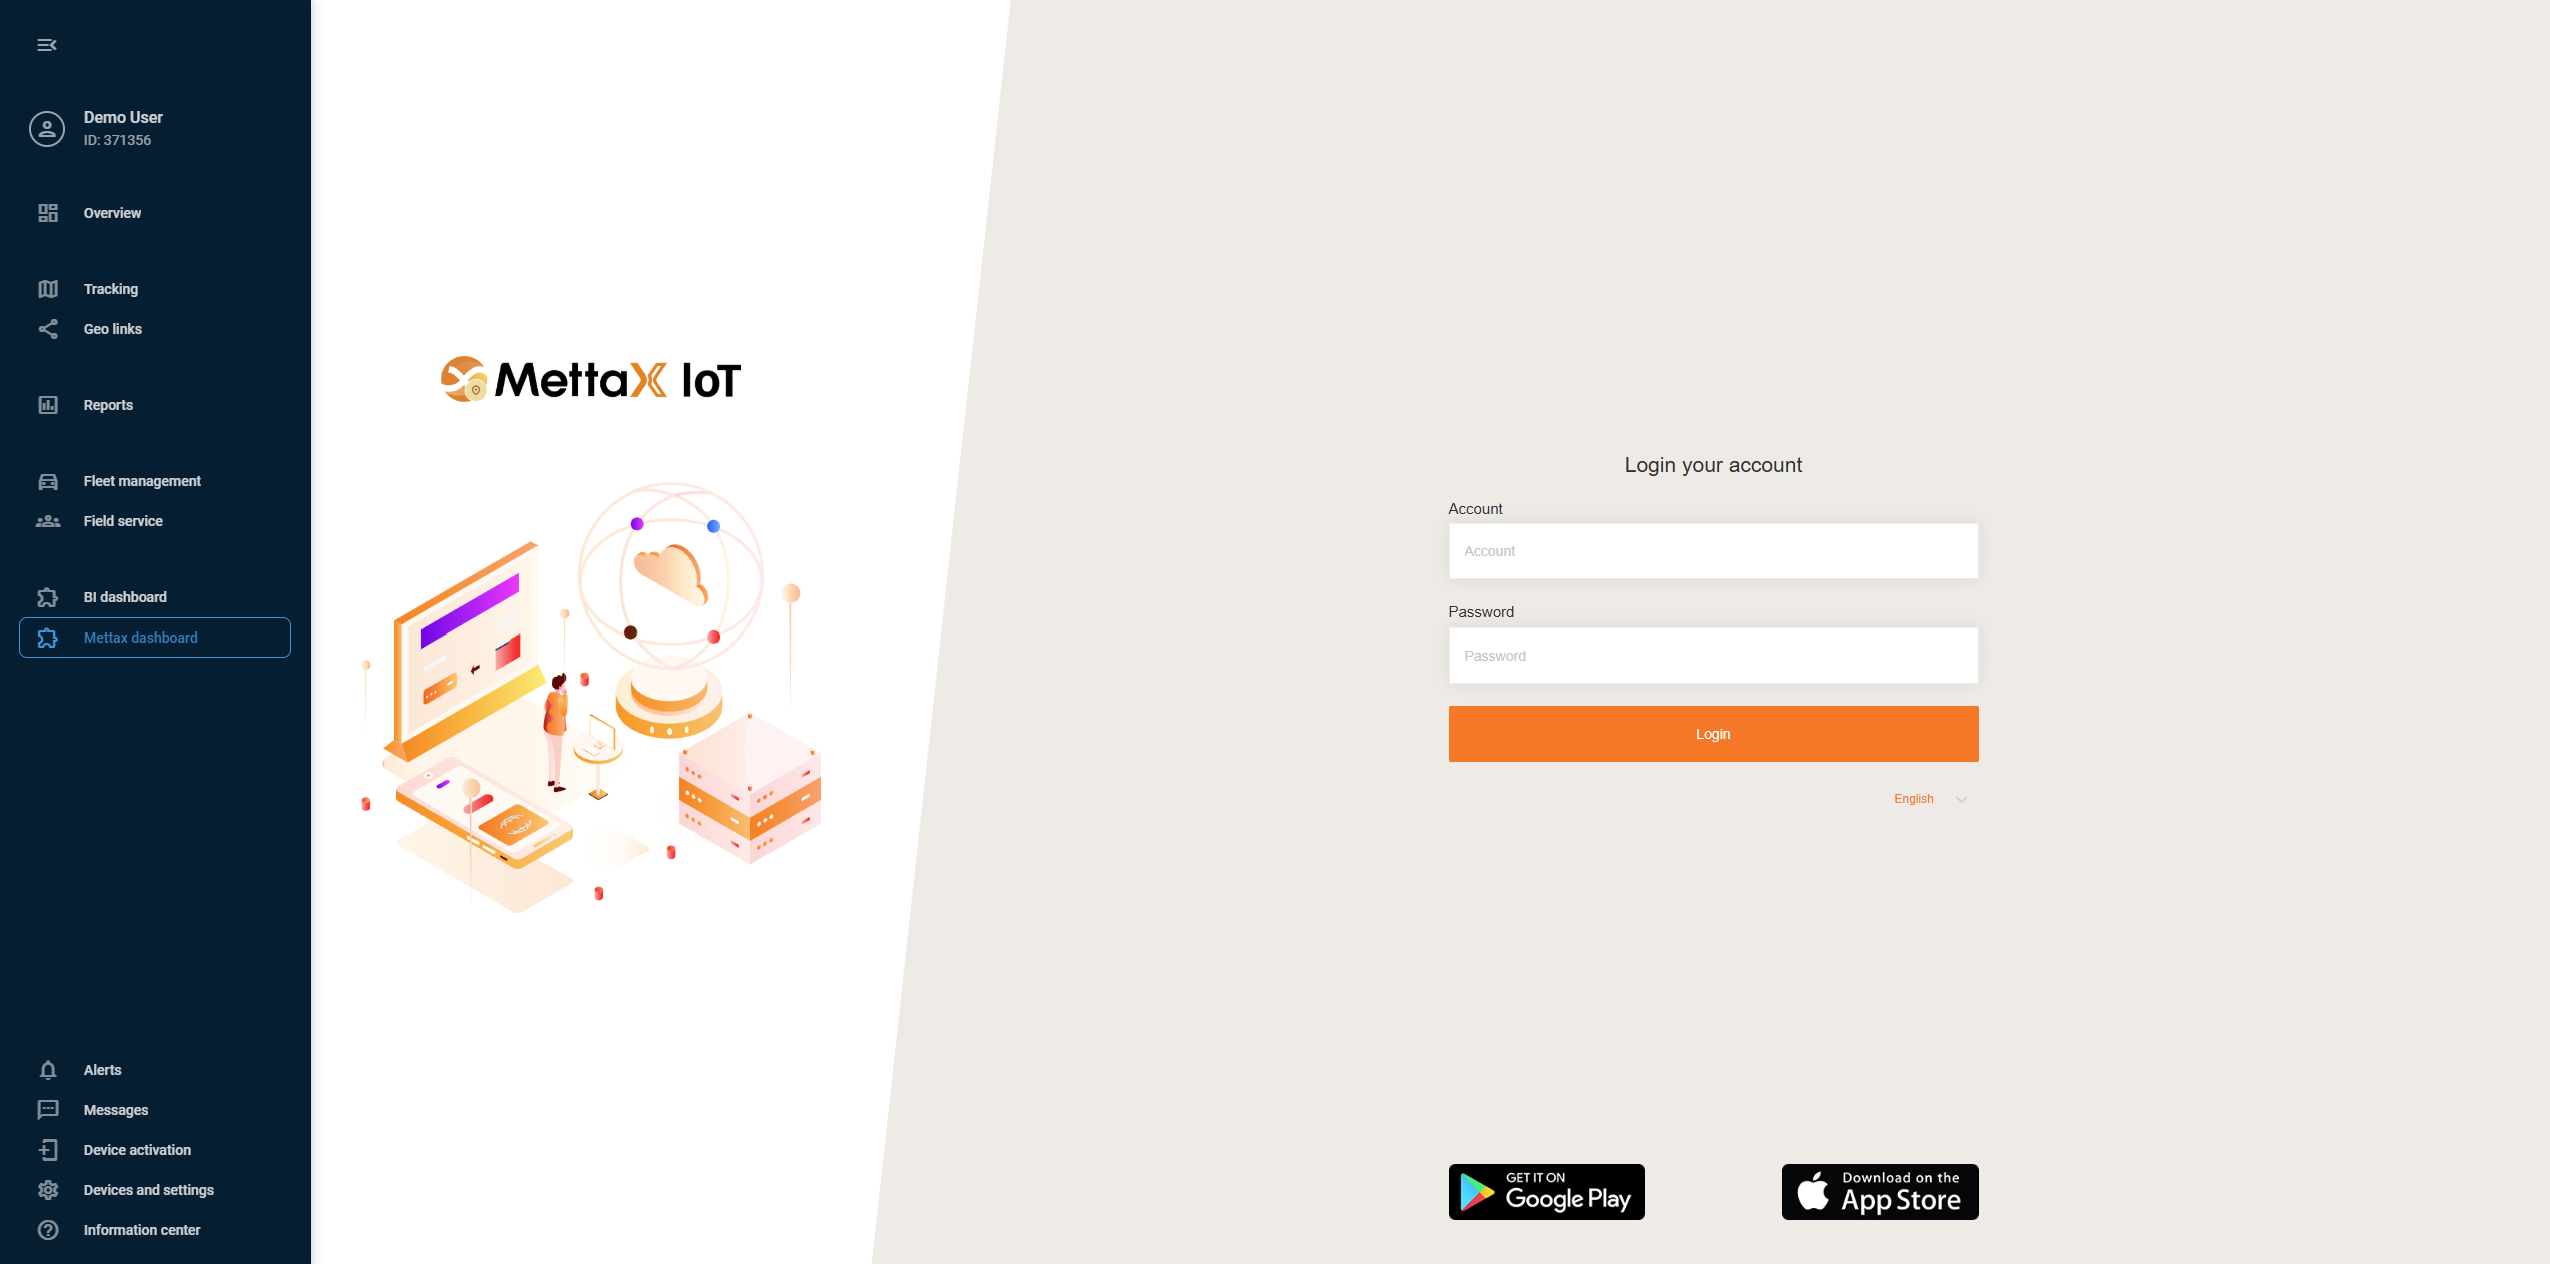
Select Embedded in the Show as field to display Mettax functionality within Navixy.
Click Save to complete the configuration.
Your new application appears automatically in Navixy’s left sidebar. Open it and log in with your Mettax credentials.